Drag and Drop this file to your desktop for quick and easy to read guidelines. Read further for additional info and tips on how to setup your files.
What you need to know! Quick Links.
• Saving as a PDF
• Outlining your Fonts
• Creating Bleed and Crop Marks
• Raster Images vs. Vector Graphic
• CMYK
• Black
Saving your Files
We have provided the file types that we accept for each product where file upload options are available. Look for our Artwork Guide Files available for each product if designing from your choice of software.
Saving as an Adobe PDF File
PDF (Portable Document Format) is a universal file format designed to present documents consistently across multiple devices and platforms. Make sure to select a high resolution option when saving this file type if option is available. This saving option is generally done using the “Save As” command in programs such as Adobe Illustrator, Adobe Photoshop, Microsoft Word, or sometimes as “ Export” in Adobe InDesign.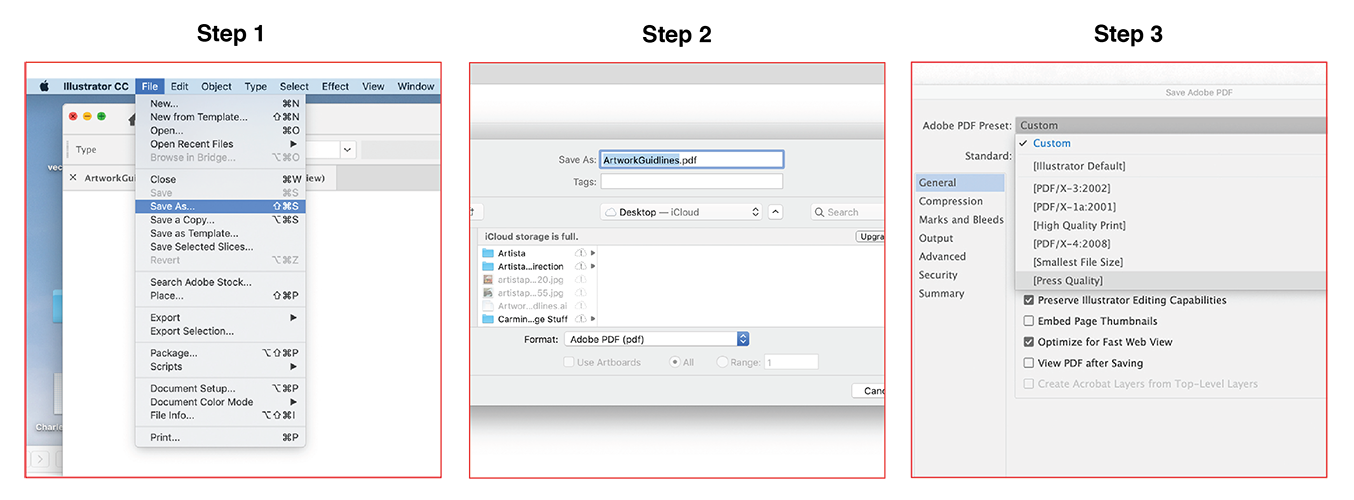
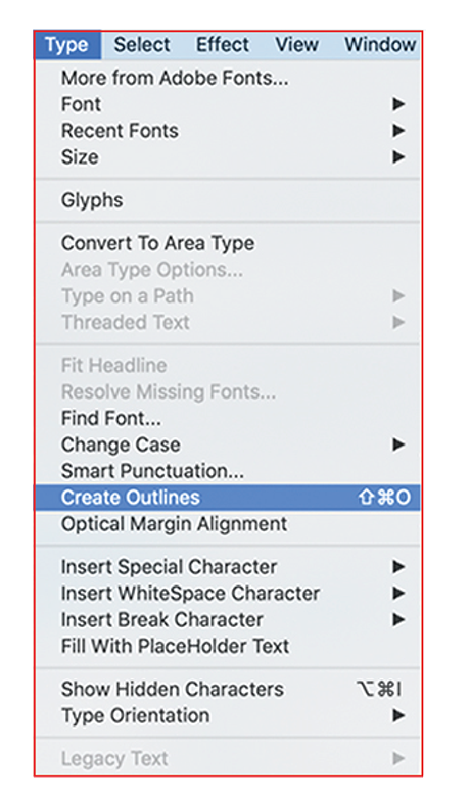
Outlining Your Fonts
Computing Definition: a font format that makes use of fillable geometric outlines of letters and symbols, allowing fonts to be scaled up or down while still retaining their intended shape. If fonts are outlined then font no longer needs to be provided to the printer.
Saving your file as a pdf will embed your fonts so generally outlining your fonts is not necessary. Although some printers will require you to outline your fonts. This will help with any font discrepancies during some printing processes. If you decide to outline your fonts for printing processes please make sure to save as a separate file and not to save over your existing file as you will no longer be able to edit your fonts once outlined.
You can find the “Create Outlines” option in Adobe Illustrator under the “Type” menu. Many different programs will have this similar option.
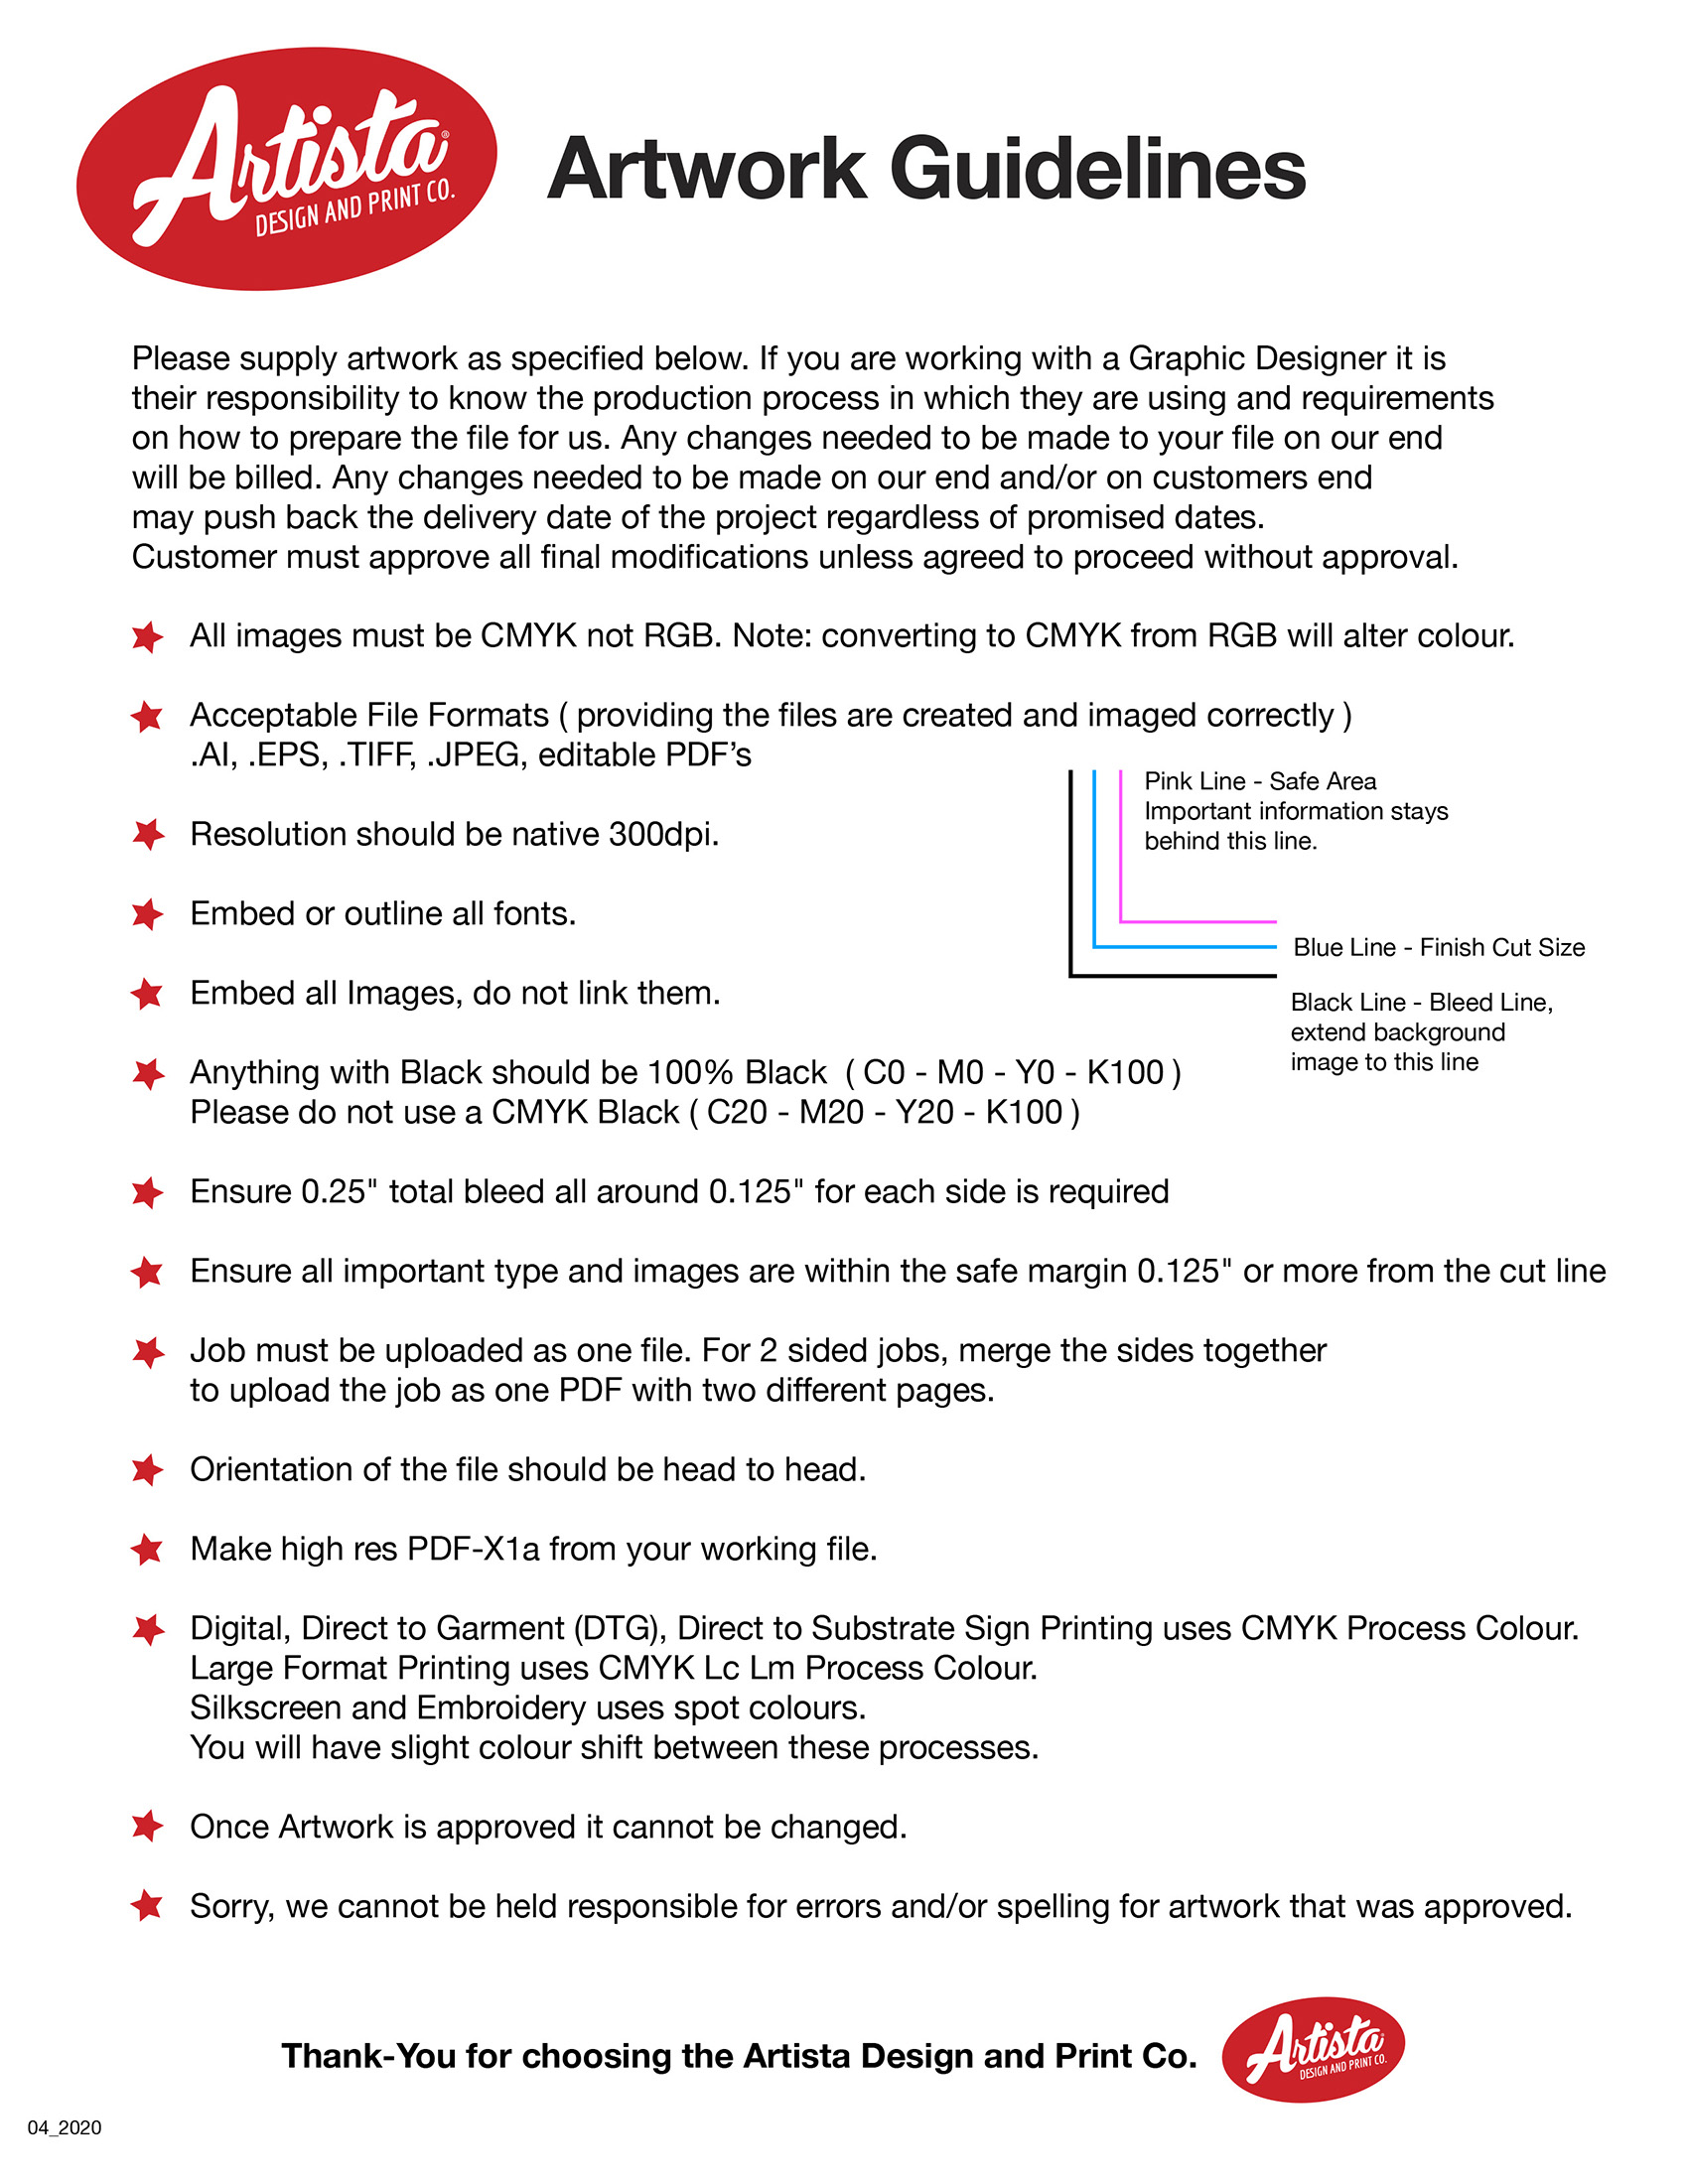
Creating Bleeds and Crop Marks
Bleed: refers to an extra 1/8th (.125") added to each side of the image or background colour that extends beyond where the paper is cut. We print the piece on an oversized sheet that is then cut down to the size requested with the appearance that the image is bleeding off the edge of the paper (Black Line - See graphic below)
Crop Marks (also called trim marks): Thin lines placed at all corners of an image, page or artwork layout to indicate where the paper needs to be trimmed after printing. Most design programs will offer options to add crop marks to your final print file.

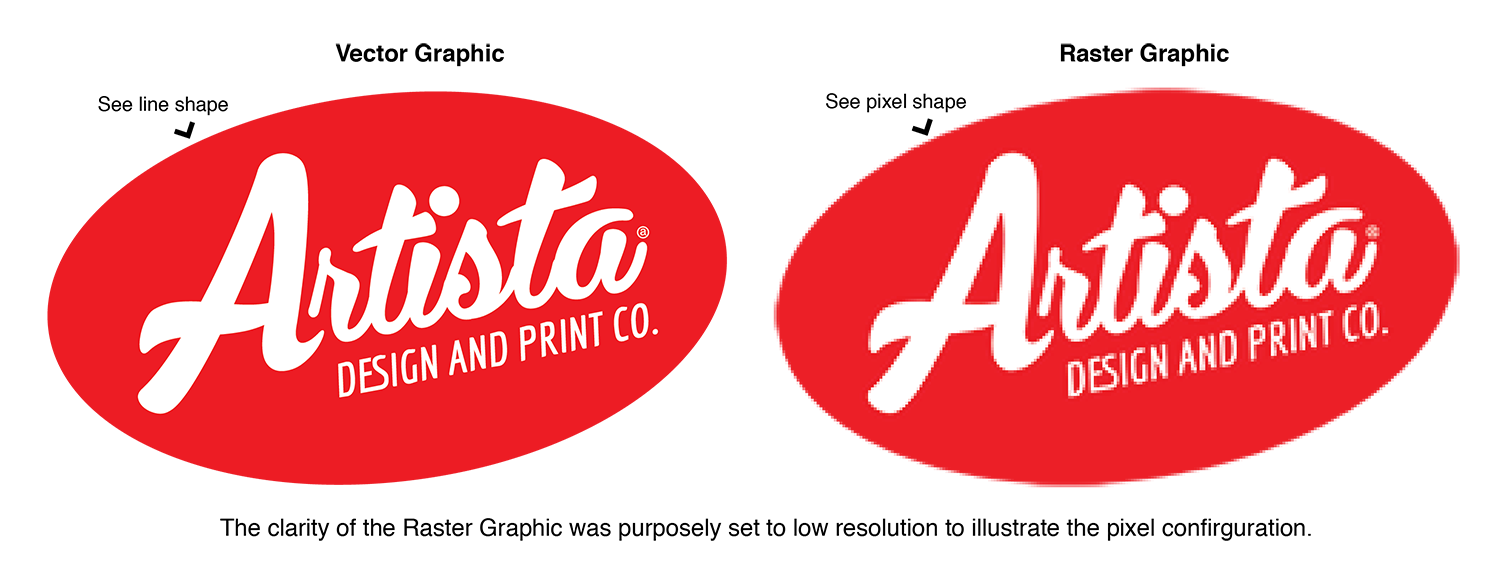
Raster Images vs. Vector Graphics
Raster Images: Are created with pixel-based software or captured with a camera or scanner. They can end in - jpeg, png and tiff. The clarity or resolution of a photo, raster graphic or image can be altered using a program (such as photoshop) in image mode settings, an example would be 72dpi (generally for web) and 300dpi (for print). Take note that when enlarging a "raster graphic, image or photo", resolution or clarity is always compromised.
Vector Graphics: Computer graphics that are defined in terms of points, which are connected by lines and curves to form multiple shapes. Vector graphics have the unique advantage over raster graphics in that the points, lines, and curves may be scaled up or down to any resolution with no loss of detail. Logo design is commonly made in a vector based program such as Illustrator. Vector graphics are commonly found in file types such as, eps, ai, pdf, and svg.
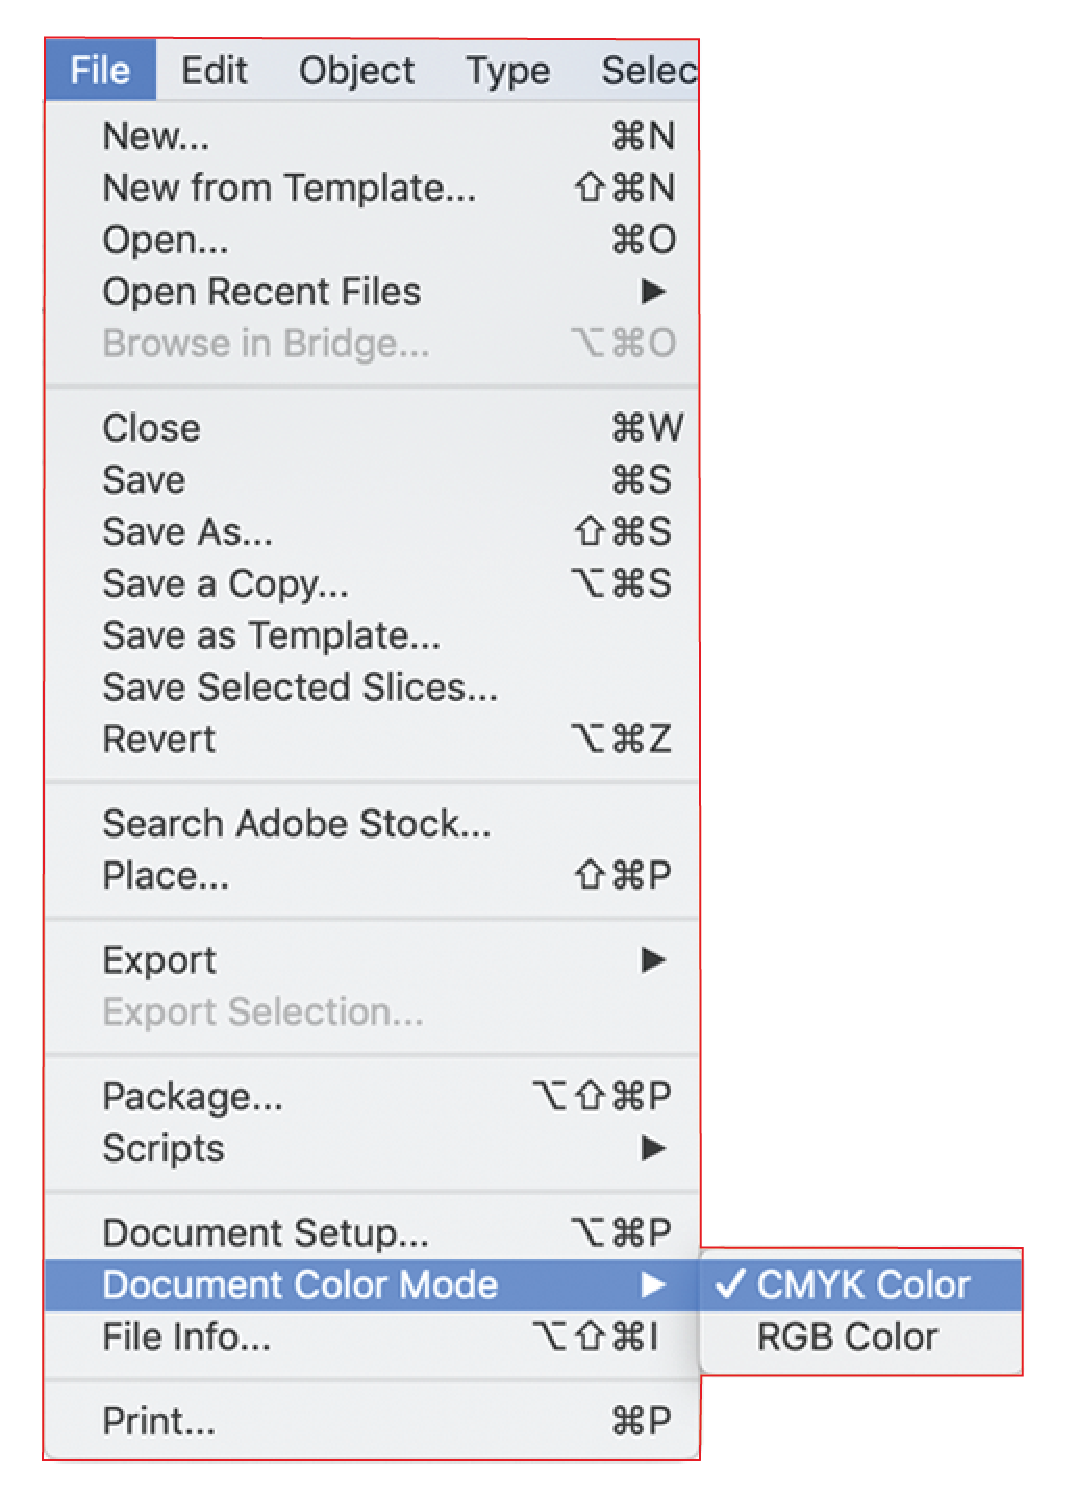
CMYK
C-Cyan, M-Magenta, Y-Yellow, K-Black. CMYK vs RGB whats the difference and why does it matter? RGB is for used for display on electronic screens (light sources such as computers, TVs, camera's and smartphones) while CMYK is for printing where pigment (inks, dyes, toner) defines the colour. Because RGB (Red, Green, Blue) has a wider range of colours than CMYK when we print an RGB File on our CMYK printers the printer will do its best to match the colour but there will be a visual difference to what you are seeing on screen and expecting to see in person. In a nutshell create your file in a CMYK colourspace or convert to CMYK before sending the Print Ready Files. The presses will love you for it!
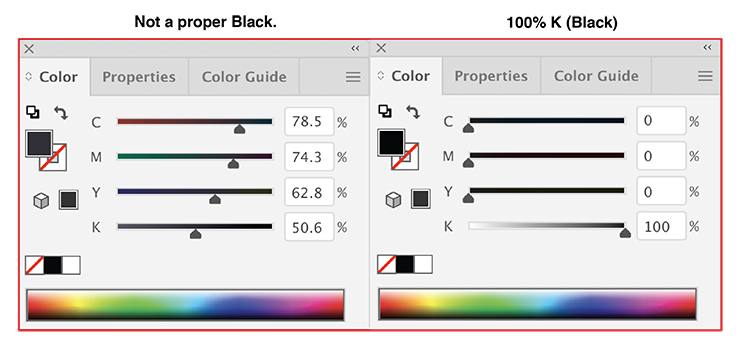
Black in CMYK
To get a deep "rich black" set all four colour values (C,M,Y, K) to 100% each. Setting to K only to 100% or a % value of anything less than 100 will result in a washed-out black.
Another Question? CLICK HERE
Back to the TOP!